Create Menu and Toolbar Button in NetBeans IDE
How to Create Menu and Toolbar Button in NetBeans IDE
1. Open Netbeans IDE
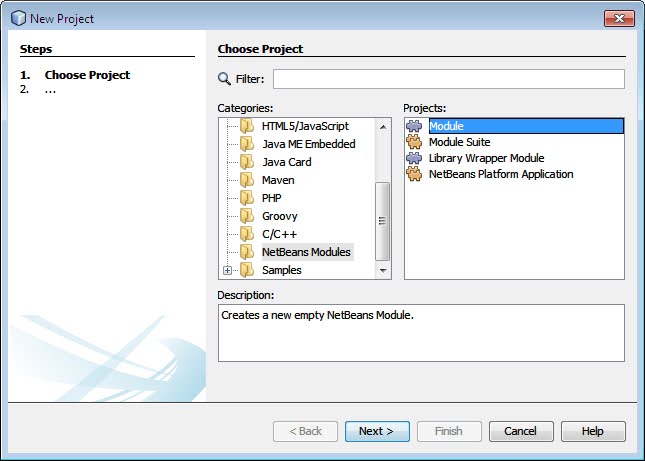
2. Go to File Select New Project or press (CTRL+Shift+N). In Categories panel select Netbeans Module > Select Module in Projects Panel > Click Next.
3.Name the project " Google " , put it in any project location of
your choice and Select Standalone Module
if not selected. Click Finish.
4. In Code Name Base type
"org.myproj.google">>Click Finish.
5.Project Created
Successfully. Below Show file structure
6. Right Click the “Google”
project node and Choose New>Other.
7. In Categories panel select
Module Development >> Select "Action" in File Type Panel >> Click
Next.
8. Action Type: If Always
Enabled Not selected then Select it >> Click Next.
9. GUI Registration Category:
- Category of your choice (I am choosing System) or Create New Category by typing a name in Category Field.
- Check Global Menu Item.
- Select Menu: In my case i am choosing “Windows” menu where my Menu Added in my IDE Select Position where you want to place menu in my choice i have select “Document Group-Here” your menu item added after this.
- Add a separator after or before i am choosing Separator Before.
- Check Global Toolbar Button.
- Select Toolbar “Remote” you choose any other of your choice.
- Select a position where your button icon shows.
- Check Global Keyboard Shortcut.
- Add Shortcut Key of your choice(Click on “Add” button and press any key combination like “CTRL+1”.
- Click Next.
10. Name, Icon and Location:
Give an Action Name "OpenGoogle" >> Give a name in Display Name
Field "LaunchGoogle". (This name display in IDE Menu) >> Select
an Icon of 16X16 pixel.>>Click Finish.
11. Write the code shown
below or code you want to execute on clicking on menu inside the
actionPerformed method.
//***********************************
try
{
URI uri = new URI("http://www.google.com");
Desktop.getDesktop().browse(uri);
}
catch (Exception ex)
{
JOptionPane.showMessageDialog(null, ex.getMessage(), "Error", JOptionPane.ERROR_MESSAGE);
}
//*******************************************
Save File (CTRL+S).
12. In the Projects window,
right-click the module project(“Google”)
node and click on Clean and Build.
13. In the Projects window, right-click the module project(“Google”)
node Choose Create NBM, as shown below:
14. To see it, look in the Files window (Ctrl-2), as shown below:
Installation
of created plugin in your IDE.
1.In your NetBeans IDE go to
Tools Menu>>Click Plugin.
2.Go to Downloaded tab and click on “Add Plugin…” button.
3.Select your created plugin(com-myproj-google.nbm)
from your location in project build folder.
4.After Adding Plugin Install it.>>Click Next>>Accept the licence.
5.Click Install>>Continue>>Finish.
Go to Installed Tab Check “Show details” and Find your installed plugin.
6.To see your added menu in
your IDE go to Windows menu Your “LaunchGoogle” menu added.
7.To see your menuitem in toolbar go to “View”>>Toolbar and click on “Remote”.
8.Menu Shortcut icon
displayed in toolbar.
9.Test your program:
Click
on ![]() this icon to launch browser that opened .
this icon to launch browser that opened .
Notes : After Adding Plugin if
your menu not displayed Restart IDE and you menu added in About menu.
Next topic : Installing Created Plugin.


Please share me plugin.
ReplyDelete